Why one chimney carries several flashings
A flashing is a strip of waterproof metal that seals the joint between a roof and something that rises through or beside it. Lead is the metal this guide covers, because it can be dressed by hand into the shape of an awkward junction and stays put once formed. A flat, simple wall might need one piece. A chimney stack standing in the middle of a pitched roof needs several, because the roof meets it on four different faces.
Think of the stack as having a front, a back and two sides. The roof slopes down towards the front face and slopes up to the back face, so water arrives at the two faces from opposite directions and a different piece of lead is needed at each. On the sides, the roof runs alongside the stack and the lead has to follow the slope. Each of those jobs has its own name.
The names matter because a quote or a survey that says "lead flashing" without saying which kind leaves out most of the information. Knowing the pieces lets you read what has been described and see which part has failed. The length of each kind and the way it is reached both shape the figure, which our guide to what lead flashing costs sets out.
Flashings on one chimney stack
- Apron across the low front face
- Stepped flashing up each side
- Back gutter behind the stack
- Saddle finishing the back corner
- Soakers under the courses beside it
Apron flashing
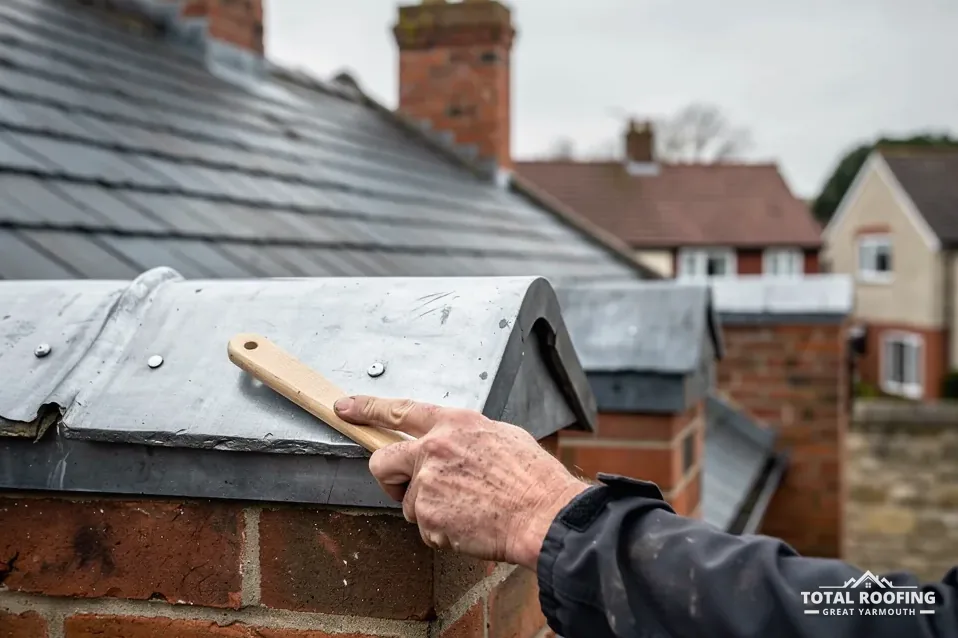
An apron flashing is a single wide piece of lead along the lower face of a chimney, the side that faces down the slope. The top edge is tucked into a mortar joint in the brickwork, or into a groove cut for it, and the lower edge is dressed down over the tiles or slates so that water running down the roof passes over the lead and on down the slope.
Because the apron sits where water arrives from the roof above and from the face of the stack, it is exposed to run-off every time it rains. The lower edge must lie over the covering by enough to shed water, and the joints at each end are formed so that nothing gets behind them. Where the covering is a pantile or another profiled tile, the lead is shaped to follow the profile, and in that case the lead is made to suit the tile rather than the other way about.
The same piece appears wherever a roof slope runs down into a vertical face: the front of a chimney, the foot of a dormer's front wall, or a lean-to roof's upper edge against a house wall. The name is the same and the idea is the same, a wide strip that overlaps the roof and tucks into the wall above. Our guide to lead codes explained sets out the sheet it is made from.
Stepped flashing and soakers
Where a roof slopes alongside a wall, a chimney side or a gable end, a stepped flashing follows the slope. The lead is cut so that each step fits against a course of bricks, with the upper edge tucked into a mortar joint that has been cut out for the purpose and the lower edge resting on the roof covering. The result looks like a staircase of lead running up the side of the stack.
Soakers are the partner of the stepped flashing. A soaker is a piece of lead folded to an L-shape: one arm goes beneath a tile or slate and the other is turned up the wall. One is laid with each course of the covering, so water coming down the wall is led over the soaker and out onto the covering. The stepped piece sits over the top of the soakers and is fixed to the wall.
The pairing works because lead soakers move with the covering while the stepped piece moves with the wall, and each can be renewed on its own. It also means that a stepped flashing with no soakers beneath it, or soakers with no cover above them, is a half-finished detail. Where a previous repair has replaced one and left the other, the survey can see the mismatch in the age and condition of the lead, and that points to where water may be getting in. Our guide to lead valley replacement looks at the other place where two slopes meet and the lead has to carry the water away.
How a stepped flashing is built up
- Joints in the wall cut out at each step
- Soakers laid under each course of covering
- Stepped lead fitted over the soaker arms
- Top edge tucked into the cut joints
- Joints pointed to hold the lead in place
Cover flashing
A cover flashing is a strip that hangs over another waterproof layer to shed water from the joint beneath it. It is fixed into the wall at its upper edge, as an apron or stepped piece is, and dressed down over the layer it protects. That layer might be a soaker, the upstand of a flat roof covering, or the edge of a lead-lined gutter.
Where a flat roof reaches a house wall, the covering is turned up the brickwork as an upstand, a short vertical lip, and a cover flashing laps over the top of that lip. The covering below does the waterproofing, and the lead above stops water getting behind the upstand. Without the cover, the top edge of the upstand is an open joint.
The strip is held at its lower edge by clips, small lead or metal tabs that stop it lifting, and sealed or pointed at the top. A cover flashing that has lifted at a corner leaves the upstand exposed, and that is one place for a leak to start along a flat roof's wall edge. The detail is simple, but it depends on every fixing being sound. A wall behind a cover flashing can also be rendered or painted, and the lead is then tucked into a groove formed in the render, which has to be sealed so that water cannot run in behind it.
Back gutter and saddle
Behind a chimney stack, the roof slopes up towards the back face, so water running down the slope meets the stack and stops there. A back gutter is a lead-lined channel formed in that dead end, carrying the water sideways around the stack and out onto the slope on either side.
The back gutter is a larger piece than an apron, because it has to carry the flow from the whole slope behind the chimney. It rises up the back face as an upstand, and a cover piece laps over the upstand. A saddle is the shaped piece that finishes the top corner where the back gutter meets the stepped pieces on the sides, giving the water a ridge to run off and keeping the corner sealed.
These are the pieces that sit hardest for the flow of water, so a failed back gutter can send rain into the roof beside the stack. The signs are staining on the ceiling by the chimney breast and damp in the loft round the stack. The pieces also need to be formed with enough fall to drain. We survey the whole roof around a chimney, not only the flashing named, and say plainly what else we saw.
Flashing terms
- ApronWide piece over the low face
- SoakerL-shaped piece under each course
- Back gutterChannel behind the stack
- SaddleShaped piece finishing the back corner
Where else these pieces turn up
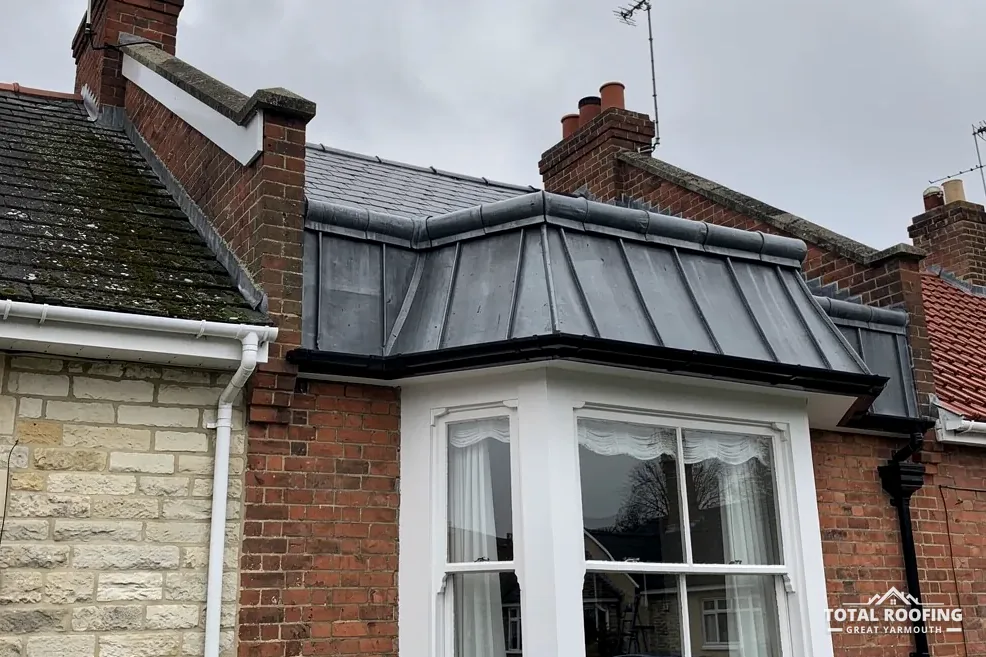
The same shapes appear well beyond the chimney, because every raised feature on a roof has to be sealed to the slope around it. A dormer, the small gabled window structure that projects from a roof slope, has an apron at the front, stepped flashings and soakers up each cheek, and a back gutter where its roof meets the main slope. A gable-end wall that rises above a roof gets stepped flashing along its length. A bay window's roof carries an apron where it meets the house wall, and a lead-covered flat roof carries cover flashings at every wall it touches.
The lead roofing and leadwork hub brings the individual guides together, including dormers, bay windows and flat roofs. What each of those guides shares is the idea that a roof leak at a junction is a leak at one of these named pieces, and finding which one is the work of a survey.
A roof can touch the neighbours in other ways as well, and lead work is no exception. Where two houses join, the chimney or wall that carries the flashing may be shared, and a flashing that runs into a shared wall can be affected by work next door. Mention it when you arrange the survey, so both sides of the line are looked at.
Myth
A single piece of lead flashing seals a whole chimney.
Fact
A chimney meets the roof on four faces, and each face needs its own shaped piece.
Fixing, laps and how long they last
Lead is held in place with a combination of fixings. The top edge of a stepped or apron piece is tucked into a mortar joint, and held with lead wedges and then pointed. The lower edge is held with clips so that it can neither lift nor slide. A fixing that grips too tightly stops the lead moving with the temperature, and the sheet cracks where it is held.
Laps, the overlaps between one piece and the next, depend on the pitch and on the position, and the specification sets them. If a lap is cut short, water can run behind the lead, and one that is left unclipped can lift in a gust. Neither shows from the ground, which is why flashing faults are found at a survey on the roof. A flashing can look intact from the pavement while a lap two metres up has opened, and a binocular view across the street is not a substitute for standing at the junction.
MyJobQuote says lead flashing that is correctly installed can last for over 80 years. That is the cost guide's phrase for correct installation, and it is not a promise about any single piece. The detail, the fixing and the lap are what the phrase "correctly installed" covers, and they are the parts we look at when we survey an old flashing.